
One of my favorite time lapses is shown in the video below and reveals significant motion of an iceberg in Alsek Lake in Alaska over a the course of about 2 hours. This scene is particularly interesting to me, because as I sat on the shore of this incredible lake with my friends for several hours, we would occasionally note that the massive icebergs had moved significantly right before our eyes without any perceptible motion. So in the remaining day light hours, I captured this berg’s motion and confirmed that it was indeed moving quite a bit right in front of us.
The basic idea behind time lapses is to speed up time in order to witness slowly varying events such as a flower blooming, the sun setting, or night falling over a city. With a workflow similar to panoramic photography, the steps can be divided into:
- Capturing the scene with a camera
- Processing the imagery into a time-lapse video
- Sharing the time-lapse
If you want a short time lapse, video recording is probably the most direct way to create one, but there is a pretty good chance that you might want to record one that is a longer duration or that requires more creative control. Such was the case when I wanted to capture the motion of the Glory-TIM space instrument several years ago. The motion of the instrument was difficult to comprehend, because it rotated once every 100 minutes and was therefore imperceptible to the naked eye. Furthermore, the instrument was housed in a restricted clean room with extremely bright lighting and was coated in highly reflective coatings. But as you can see below, the time lapse video is able to easily convey the instrument’s motion years later and from the comfort of your living room. If I had not spent the time to capture the motion in a time lapse format, I would still find myself waving my hands in the air trying to explain the motion instead of simply showing a video.
The motion of the instrument took place over several hours which would have rendered typical video recording time useless, since most cameras are limited by their recording media to 30-90 minutes. But in addition to the time limitation, the size of the recorded media for such a long duration would have been enormous in digital terms and would have been truncated down to a much shorter duration resulting in an extremely inefficient process. Finally, the quality of the video would not have been comparable to that from a still camera for two reasons. At that time, 640x480 VGA video resolution was the standard, which was a much smaller pixel count than the digital camera whose still images were able to record in excess of 1080p HD resolution. But at least as important as resolution, the still camera included manual controls that were able to compensate for the high contrast scene between the black background and the shiny, silver instrument. Although a high end video camera might have such controls, I was able to accomplish precise manual control with $350 still camera.
The camera I used to shoot this time lapse was a Canon S3is and contained a feature that was dedicated specifically for this purpose called an intervalometer. In order to use the intervalometer, the user specifies how often the photos should be taken and how many photos should be taken, although this camera limited the maximum duration to somewhere around 90 minutes. Fortunately however, the camera had another slick feature that bi-passed this limitation via a computer controlled interface. The camera was connected to Canon software on a PC via a USB cable and each time a photo was shot, it was downloaded to the PC’s hard drive for almost infinite storage capability. But there was one more thing that almost stopped the time lapse from happening that we are all familiar with and that was battery life. The intervalometer function required the camera to be powered continuously and even in the lowest power state with the LCD display turned off, it wouldn’t last more than about 2 hours. For the S3is camera, the solution was quite simple since Canon sells a proprietary AC power adapter that worked like a charm for my situation.
The instrument functioned perfectly throughout the test and the camera did a beautiful job of capturing images every 30 seconds. After the test was complete, I imported all of the photos into Windows Live Movie Maker and adjusted the duration of the images until pleasing effect was produced. And this is the typical second step of time lapse photography: Import all of the images into your video editing software and scale the image durations of all the images so that the motion is not too fast, not too slow, but just right. As you can tell, the sharing aspect was the same for all the time lapses, as I simply posted it to YouTube for the world to see.
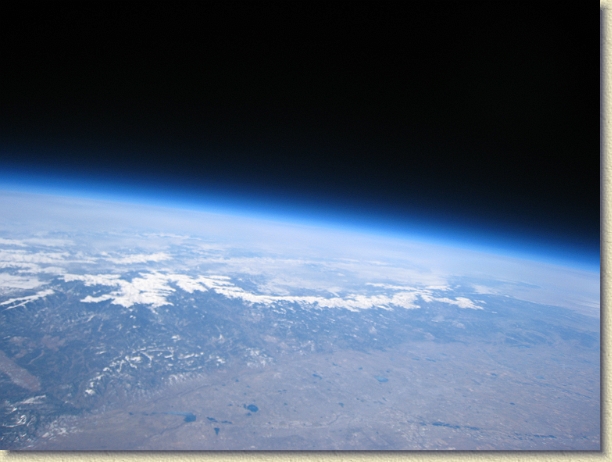 I was extremely pleased with the results of time lapses from the Canon S3is (incidentally, the iceberg dance was also shot from the S3is), but intervalometer functions are not particularly common on digital point-and-shoots, and the short battery life and limited number of photos were discouraging. Granted, there are remote shutter intervalometers for digital SLRs that can also be configured with external battery packs, but that approach quickly removes the technique from most budget-minded individuals. Fortunately, around Christmas of 2009, a crazy plan was hatched by some friends and I that resulted in launching several weather balloons to the edge of space to shoot photos, some of which formed a time lapse of sorts near the end of the video that I compiled about the balloon flight. As part of this plan, my friend, Sam, discovered a method of providing custom functions on Canon point-and-shoot cameras called Canon Hacker’s Development Kit (CHDK).
 CHDK is an extremely powerful way of customizing the functionality of your existing Canon camera with the ability to add features such as manual controls, time lapse, automatic lightning capture, motion capture, remote shutter, raw image capture, histogram displays, and remote shutter buttons. Of course for our application, time lapse was the critical feature and Sam quickly figured out how to program the camera to perform our custom task. The process involved adding a small set of files to the SD memory card, creating a script to execute certain functions, and then accessing the script once the camera was turned on. In our case, the camera was programmed to take photos at a preset interval in automatic exposure and focus mode with the display turned off and to enter a sleep mode between shots to conserve battery life. As a way of conveying how useful the scripting can be, he even added a low battery mode that decreased the frequency of photos after the battery dropped below 20% capacity. This method was so successful that my little camera flew on that balloon plus another flight on St Patrick’s Day and a third flight that ended very interestingly :-) In each case, the camera continued operating for over 4 hours even under extremely cold conditions. The camera proved to be even more robust as evidenced by several flights when it was hung under a common kite to take aerial photographs of LASP and my Red Rocks campsite!
As you can see, CHDK and an inexpensive Canon point-and-shoot camera can be a very compelling way to enter the world of time lapse photography, but there are even more ways to shoot photos at fixed time intervals. One of the most obvious is to simply press the shutter manually at fixed intervals. This may almost seem too simple, but this technique has been successfully used to document seasonal changes in people’s backyards quite compellingly. Assuming that you don’t want to remember to manually capture a photo every day of your backyard, you could make use of another common technology and install a web cam to shoot photos at least once a day. The image quality probably isn’t the best from a web cam, but chances are that you could automate the process in a way that would be difficult to duplicate by other methods for such long durations. Finally, one of the new technologies that I’m going to explore soon is the GoPro Hero camera that provides first-person-view (FPV) video recording for action sports. GoPro’s are inexpensive with decent image quality, and unbeknownst to many people contain an intervalometer function built right in. I can already imagine kayaking a great river with my GoPro mounted to my helmet during the rapids and then setting it on the shore to capture the tranquil sunset of our river camp.
Even though this might not be the most comprehensive article on time lapse photography, hopefully it has provided an overview of the tools and approaches that can get on your way towards creating your own time lapses. Good luck and let me know if you have any tips or tricks that you discover along the way!
No comments:
Post a Comment